8 - Design the Palm User Interface
This section switches back and forth between two programs: the CodeWarrior IDE
where a CodeWarrior project is created, and the Constructor where the application GUI
is designed.
The end result will be a Constructor project or resource file, stored inside the
CodeWarrior project. In a later section the C code will be added, but this section
concentrates on creating the Palm user interface.
-
If you haven't done so already, create a master directory (folder)
to hold the database and other project files. This article is using c:\amisc\ull
where "ull" stands for "UltraLite Lite".
-
Use Start - Programs
- Metrowerks CodeWarrior
- CodeWarrior IDE.
-
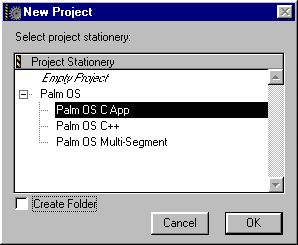
Choose File - New Project
and highlight Palm OS - Palm OS C App.
-
Uncheck Create Folder because you have already created the
c:\amisc\ull master directory.
-
Press OK to display the Name new project as dialog box,
then type ULLDemo1 in the File name field and
choose directory c:\amisc\ull.
-
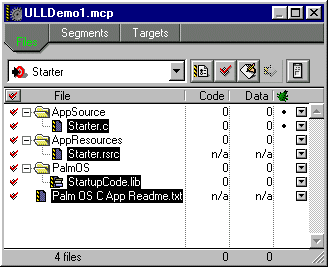
Select the following items, and delete them all with
Project - Remove Selected Items:
- Starter.c
- Starter.rsrc
- StartupCode.lib
- Palm OS C App Readme.txt
-
Delete the following files; these files were created by CodeWarrior as a
"template" or "starting point"
when you chose File - New Project, and they aren't used in this article:
   c:\amisc\ull
      Palm OS C App Readme.txt
   c:\amisc\ull\Src
      Starter.c
      Starter.rsrc
      StarterRsc.c
      StarterRsc.h
   c:\amisc\ull\Resource.frk
      Starter.rsrc
|
-
Use Start - Programs
- Metrowerks CodeWarrior
- Constructor for Palm OS.
-
Choose File - New Project File,
then File - Save.
-
In the Save As dialog box
type ULLDemo1 in the File name field
and choose directory c:\amisc\ull\Src.
-
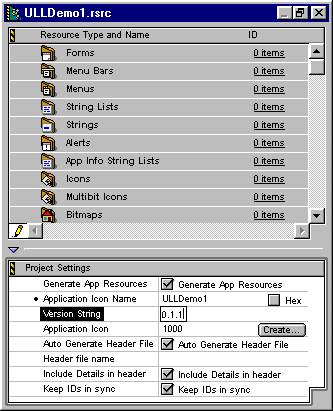
Type ULLDemo1 in the Project Settings - Application Icon Name field
and 0.0.1 the Version String field:
-
In the ULLDemo1.rsrc window, highlight the Forms bar
and choose Edit - New Form Resource.
-
Click on the form name and change it from untitled to ulldemo1.
Warning! When you click on a field in the Constructor, you might
have to wait for a split second before the field actually becomes editable.
-
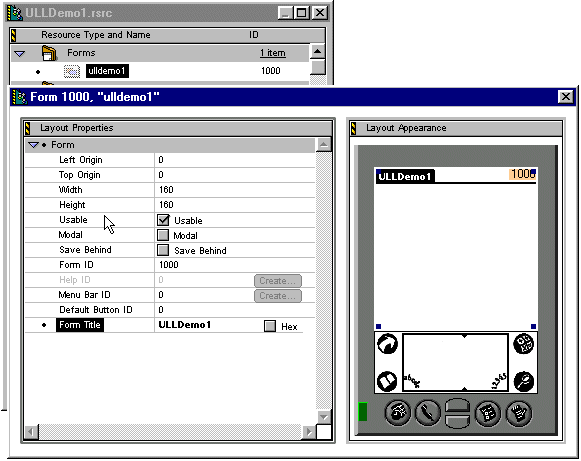
Double-click on the ulldemo1 form bar
to display the Form 1000, "ulldemo1" window.
-
Type ULLDemo1 in the Form Title and press Enter:
-
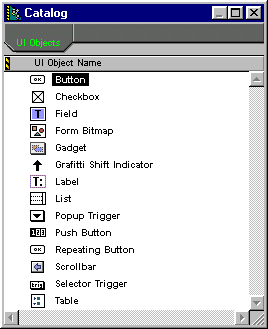
Use Window - Catalog or Ctrl+Y to open the Catalog window:
-
Drag a Button from the Catalog window
to the Layout Appearance pane.
-
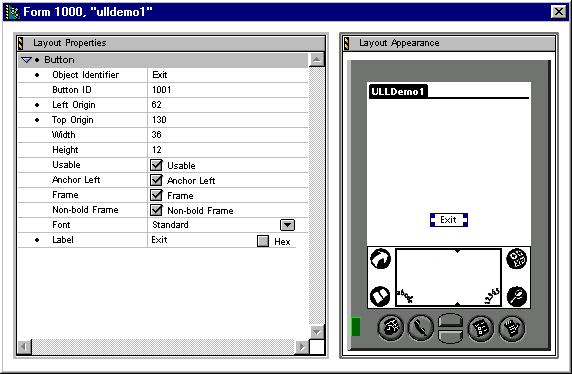
Change the button's Object Identifier field
from the default value Unnamed1001 to Exit.
-
Change the button's Label field
from the default value OK to Exit.
-
Note that the form and the button are automatically assigned ID
values like 1000 and 1001. These values are important to your program code but
you don't have to remember them or code them as numbers.
To see your form without the ID values, use Layout - Hide Object IDs:
-
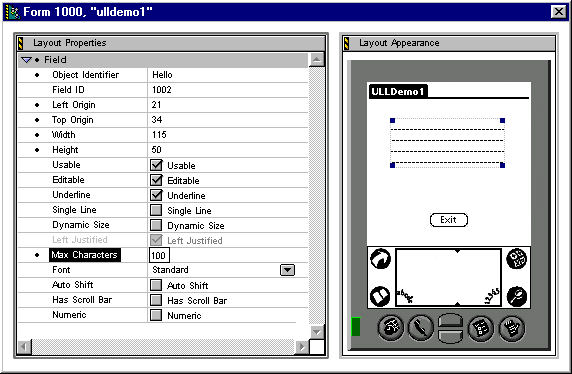
Drag a Field from the Catalog window
to the Layout Appearance pane.
-
Resize the field to show several lines, and change the attributes as follows:
Object Identifier: Hello
Max Characters: 100
-
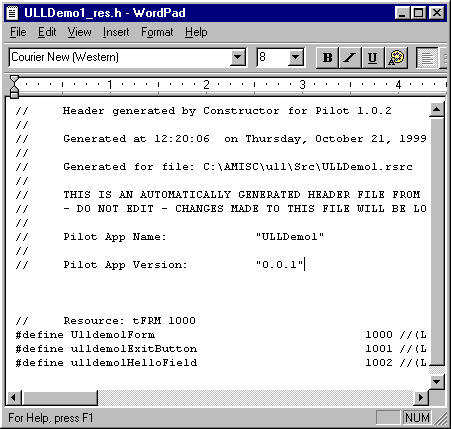
Save the Constructor project with File - Save, then have a look at the
resulting source file ULLDemo1_res.h in c:\amisc\ull\Src:
(This file will referenced as #include "ULLDemo1_res.h"
in Section 9 - Write the C and ESQL Source Code.)
-
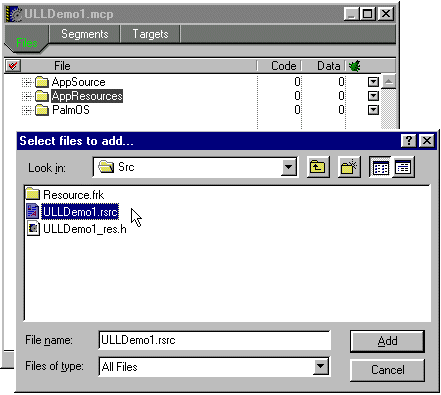
Back in the ULLDemo1.mcp window in CodeWarrior,
select AppResources and use Project - Add Files
to add the Constructor resource file name:
c:\amisc\ULLDemo\Src\ULLDemo1.rsrc
|
Don't panic! If you can't see the resource file,
it just means the Select files to add... window
defaults to showing only source files.
Change it to show All Files and ULLDemo1.rsrc will show up:
-
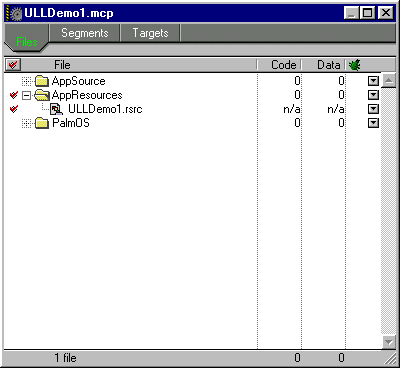
At this point you have created two projects:
-
a Constructor project or resource file in c:\amisc\ull\Src\ULLDemo1.rsrc, and
-
a CodeWarrior project in c:\amisc\ull\ULLDemo1.mcp which contains
the Constructor project:
|
|


